With GIMP on your computer, you can crop pictures easily. The pictures are then can be inserted into your writing documents. I present you below a video and an explanation to do that. This article is one part of GIMP Guide For Authors. Happy editing!
(GIMP crops a picture in one minute)
Crop
- Crop tool on toolbox.
- Shift+C on keyboard = crop.
- Tools > Transform Tools > Crop on menubar = crop.
You can use either one of three ways above. Then drag and drop on canvas to form a rectangle. A special rectangle covers a certain part of the picture. Adjust the width or height by dragging the four handles. Click one handle to apply the crop. To undo, press Ctrl+Z. To redo, press Ctrl+Shift+Z (it is not Ctrl+Y here). To save, press
Ctrl+S and it will be saved as GIMP's native format .xcf comparable to Photoshop's .psd (it is not the final picture). To export final picture, press
Ctrl+Shift+E and determine the filename and the extension: type filename extension desired such as picture
.png picture
.gif picture
.tiff picture
.bmp picture
.tga and others.
Exercises
Here are assets to crop for you. They are beautiful wallpapers you saw in video above.
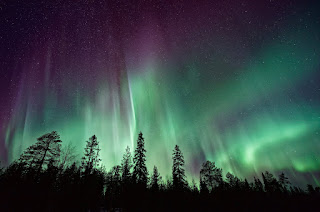
- Aurora Borealis (JPG) - try to crop the aurora without the trees.
- Logotype (JPG) - crop the ZORIN wordmark like video above.
- Hot Air Balloons (JPG) - crop the baloons without the sky.
- Hexagons (JPG) - crop some deeper levels hexagons.
- Mountain Lake (JPG) - crop the water without the mountains.
to be continued...
This article is licensed under
CC BY-SA 3.0.


