
This tutorial will explain in step by step how to record a computer screen (also known as screencasting or screen recording) using OBS Studio program. The program is available on Ubuntu GNU/Linux and all other operating systems as well. This will result in a video with a select file format like mp4 or mkv with your voice recorded in. Optionally, we include the setup so you can also record two way voices, both input and output, to record a video conference session with many participants, for example. We will explain it from installing the software to finishing the video.
Subscribe to UbuntuBuzz Telegram Channel to get article updates.
Features
Before starting the exercise, it's better to know the program we will use, OBS Studio. This program can record / is:
- full width, one window, or a free selection area of screen
- with both input and output audio,
- in mp4, mkv, flv, ts, and mov formats,
- with or without camera to show user's face,
- on both Xorg and Wayland technologies,
- an alternative to proprietary software Camtasia or Bandicam,
- free, libre, open source software (FLOSS); and
- available for GNU/Linux, Windows and MacOS.
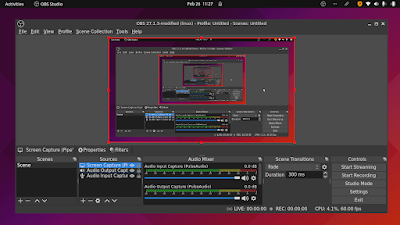
User Interface
Its user interface is illustrated in a simple way as below.

- Preview area, where you see what being recorded.
- Sources area, where you add / remove recording input items.
- Audio Mixer area, the color indicators will move following audio input and output.
- Controls area, where Start / Stop Recording buttons and Settings displayed.
- Status bar, where information about live recording / live streaming displayed.
- Application logo at system tray.
- Screen recording indicator, if displayed then the screen is being recorded.
1. Install the Program
For Ubuntu version 20.04 LTS, do the following:
$ sudo apt-get install obs-studio
For Ubuntu version 21.04 and above, do the following:
$ snap install obs-studio
This difference is caused by Wayland, a new desktop technology adopted by Ubuntu most recently and the Snap version is already successful to run on it.
2. Configure the Screen Record
Below's the options your can enable with OBS Studio:
★ Sources: screen capture | camera | audio input | audio output
★ Width: full screen | one window | free selection
★ Format: mkv | mp4 | flv
For example, if you want to record the most complete case including your voice, your face, your screen, and your participants' voices:
1) Run OBS Studio.
2) Click + button under Sources, add Screen Capture for full screen | add Window Capture for one window only. This already includes audio input and output captures.
3) Repeat (2) but add Video Capture Device (Camera). Then adjust your face capture position on screen.
4) Click Settings button under Controls, then click OK after adjusting
Output section: select a Recording Path (where to save as the video file) and the video format (mkv is good enough already).
Video section: select an Output Resolution (smaller than original is allowed, if you want smaller file size) then select an FPS (smaller than original is good if your hardware is not high-specs).
7) Continue next section.
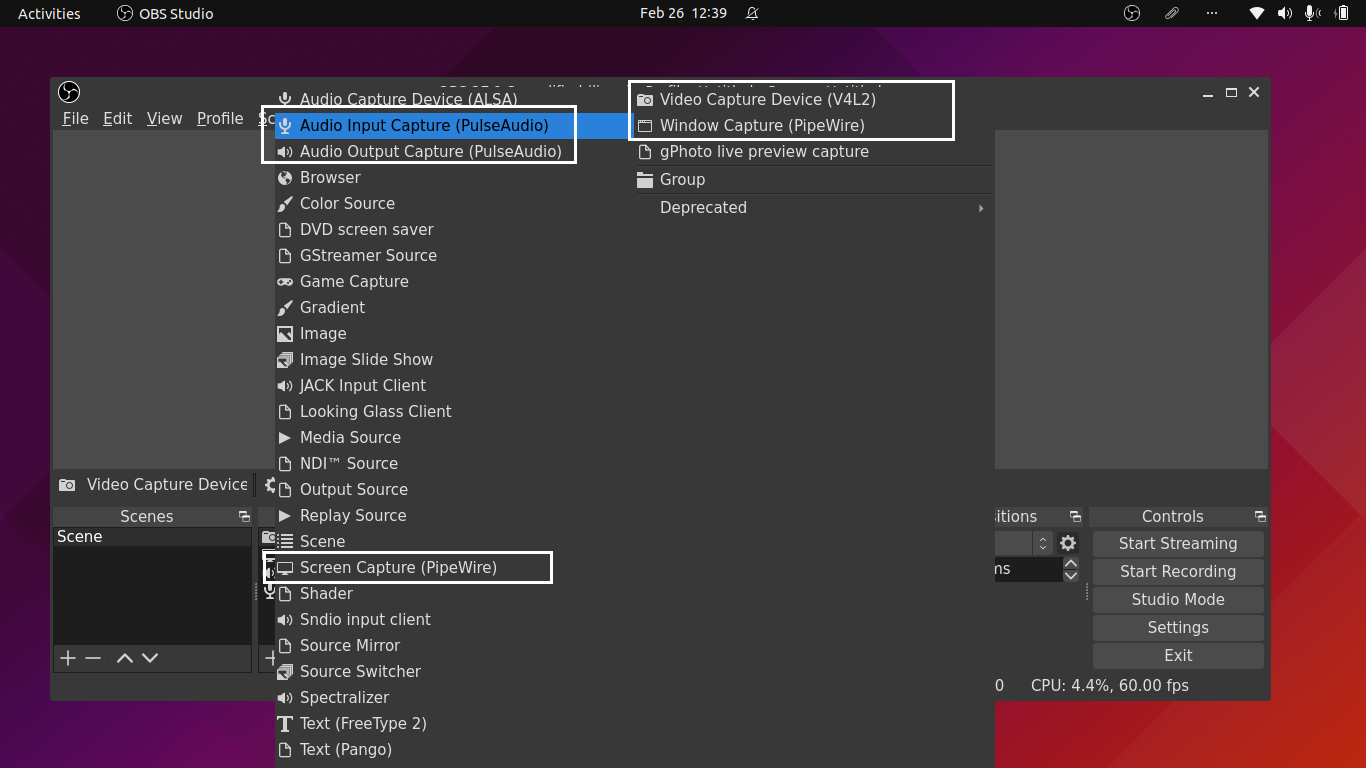
(OBS Studio: showing the options under Sources section)
Notes about Wayland and Xorg: on Ubuntu 21.10 and later, the screen options may look like "(PipeWire)" like pictured above. On Ubuntu 20.04 LTS and before, the options would look like "(XSHM)".
Notes about Audio Input/Output: the two separate options, Audio input capture and Audio output capture, are not needed by default as the screen capture already includes them.
3. Start Recording
- Click Start Recording
- Do activities as you wish until finished.
4. Finish Recording
- Click Stop Recording.
- Video saved.
5. Test Recording
For most users, testing your recording is a must, otherwise you might lose your recording. For testing purpose, do the following:
- 1) Play the recorded video from Section 4. Is it good enough? If not, continue next step.
- 2) Repeat Section 2 by adjusting one criteria, for example, decrease FPS if you think your computer goes slower while recording.
- 3) Go to (1) and if it is good enough, stop testing, otherwise continue (2).
That's it! You finished making a screencast to this point.
Further Notes
• Cinelerra is the most complete video editor for GNU/Linux users you can use to edit your screencasts professionally.
• Screenkey is the on-screen keyboard typing indicator for you tutorial makers. You can display your keystrokes on your screencasts with it.
• Alternatives to OBS Studio are available, if you think it's heavy to your computer, feel free to see our Simple Screen Recorder and Kazam tutorials.
This article is licensed under CC BY-SA 3.0.