
This tutorial explains in step by step how you can install Ubuntu 23.04 Lunar Lobster into your computer. It will be a bit different to the previous release as this Lunar begins a new installer in the Ubuntu history. We keep this tutorial simple for you so please read on and we wish you success.

Subscribe to UbuntuBuzz Telegram Channel to get article updates.
About This Tutorial
With this tutorial you can install Ubuntu operating system
- to your computer or laptop
- into hard disk drive, SSD or even USB flash drive
- alongside Microsoft Windows or Apple MacOS, if any
- using either UEFI mode or BIOS Legacy
- using GPT or MBR (Legacy) storage technology
- without deleting any of your existing system and data
Ubuntu Lunar Installation Notes
We feel the need to mention that version 23.04 codenamed Lunar Lobster got a new system installer with several differences compared to any older releases. It does not use Ubiquity anymore but its new Flutter-based installer instead. Among the differences are the ability to create EFI partition automatically in the disk partitioner and light/dark theme choices.
Ubuntu Preinstalled Laptops
We always want to share with you that today Ubuntu preinstalled laptops are available from multiple brands so now you can purchase a branded one with Ubuntu and not Windows. You may want to know among the brands are StarLabs, LaptopWithLinux, and TUXEDO. Click any logo below to find the laptop. Aside from it, to install Ubuntu by yourself, please follow the rest of this tutorial.
 |
 |
 |
Requirements
- 1 x PC or laptop.
- Either BIOS Legacy or UEFI system in the computer.
- 1 x USB flash drive >= 4GB (we call this "bootable").
- 1 x disk storage (you may use either a hard disk, an SSD or a USB flash drive)
- 1 x Ubuntu Desktop 23.04 Lunar Lobster image file.
For example, to write this tutorial we actually installed Ubuntu 23.04 into Lenovo ThinkPad T430 (laptop), a 16GB flash drive (as bootable), a 32GB flash drive (as target), and Ubuntu 23.04 (as the operating system). Internet access is not required.
(*) We strongly suggest you to get a new USB flash drive and not using a used one. It is still cheaper than hard disk drive.
Preparations
First, Get Ubuntu 23.04 Lunar Lobster
Download from official website https://ubuntu.com.Second, Make Ubuntu Bootable
Visit How To Make Ubuntu Bootable Medium to practice it to your bootable flash drive.
Third, Boot Up
Once you made a bootable medium,
1. Turn off your computer.
2. Plug the bootable medium into the USB port.
3. Turn your computer on.
4. Your computer should boot into Ubuntu 23.04 installation screen. This release's wallpaper is a lobster.
5. The installer will show on the desktop. If it does not, simply click the top most of the icons namely "Install Ubuntu" and it will show up.

Ubuntu Installation
Once all preparations completed, and the installer is ready, do the following steps one by one carefully.
Step 1. Select Language
Select English from the language selection and click Next.

Step 2. Select Keyboard Layout
Select English (US) and click Next.

Step 3. Select Network
Select I don't want to connect or similar option and click Next.

Step 4. Select Normal or Minimal Mode
Select Normal Installation and click Continue.

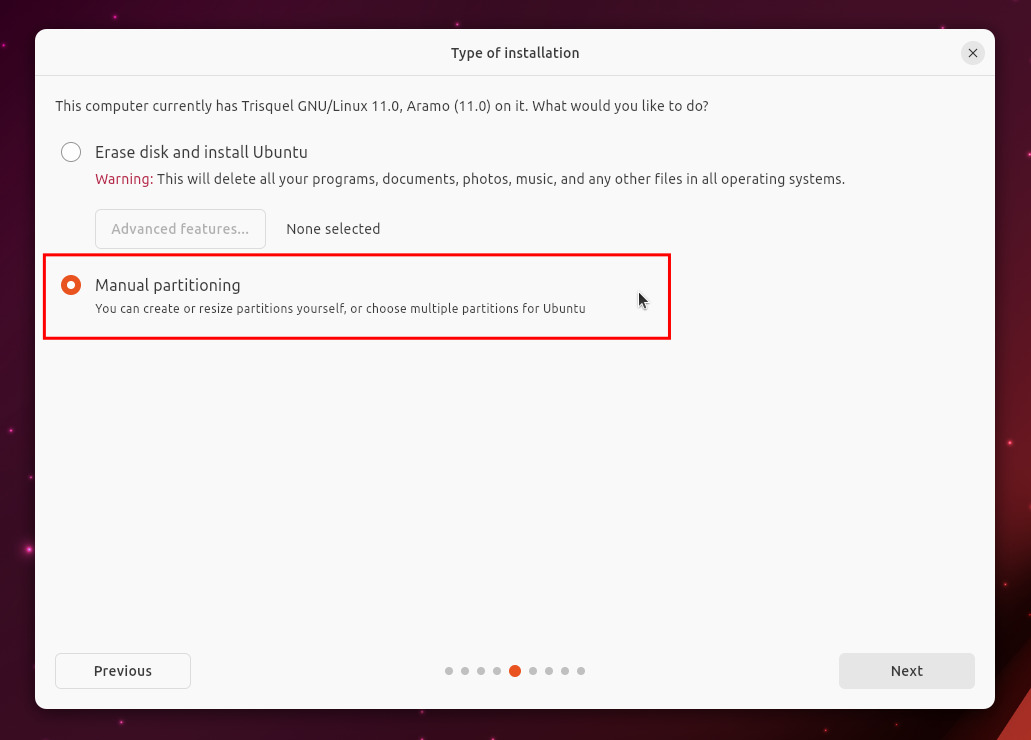
Step 5. Select Type of Partitioning
Select Something Else or Manual, that is, not the automatic one, and click Next.
Step 6. Disk Partitioning
You will create three (3) disk partitions in the target storage (it could be a hard disk, an SSD, or even a USB flash drive) as the followings. Please remember that the EFI partition will be created automatically thanks to the new installer technology.
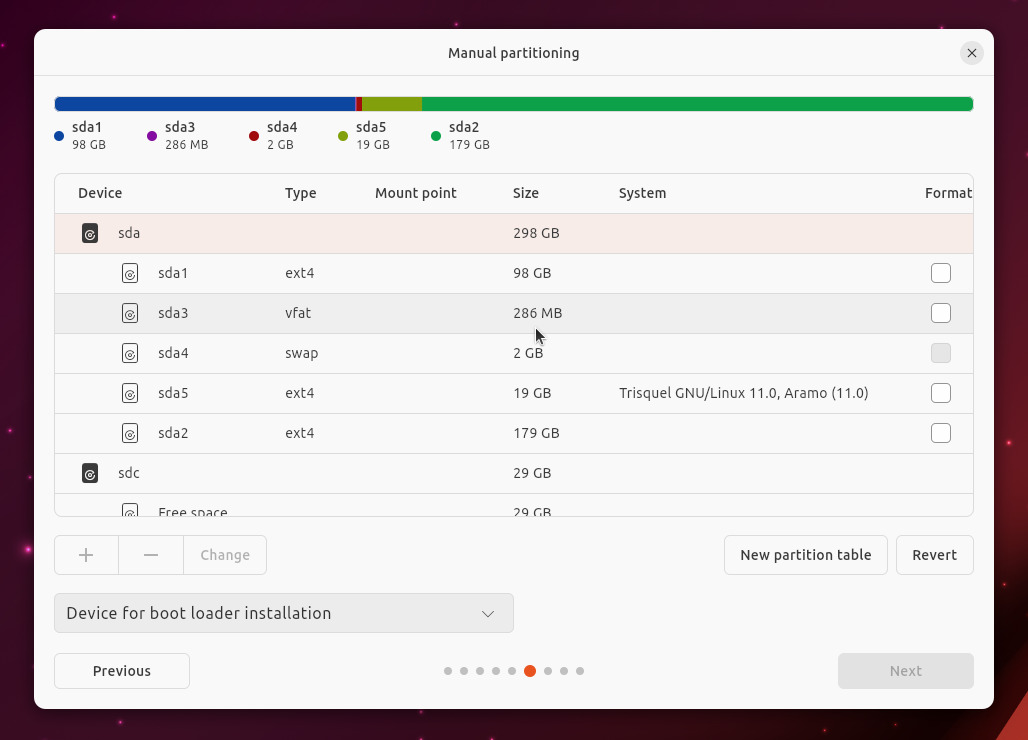
Initial view:
First run will show the disk partitioner as the following. Yours will not be exactly the same as ours, but you will understand it right away. Please notice below the sda as our first storage (hard disk) and the sdc as our second one (USB flash drive).
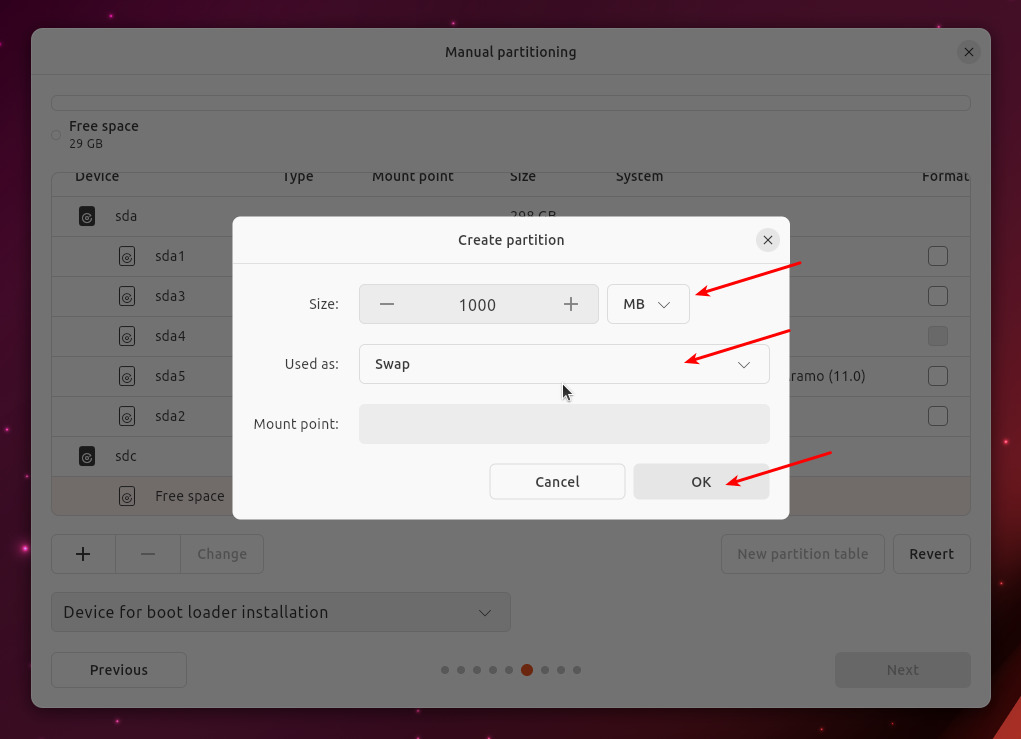
Create swap partition:
1. Select free space under the storage (hard disk, ssd, or flash drive).
2. Click plus button (+) .
3. Create partition dialog will show.
4. Fill the size 300 MB.
5. Select Use as: swap.
6. Click OK.
Create ROOT partition and EFI partition:
1. Select the remaining free space.
2. Click plus button (+).
3. A dialog to create partition will show once again.
4. Do not change the size. For example, in our test it is about 28000MB and we don't change it at all.
5. Select use as: EXT4.
6. Select mount point: slash character ( / ).
7. Click OK.
8. This will create a root partition and automatically create an EFI partition.

Place the bootloader:
1. To this point, an EFI partition should be created automatically. You do not need to create one manually anomore.
2. Select boot loader location the same as what disk drive the EFI partition belongs. In this example, we choose sdc because our EFI is at sdc3.
3. Click next.
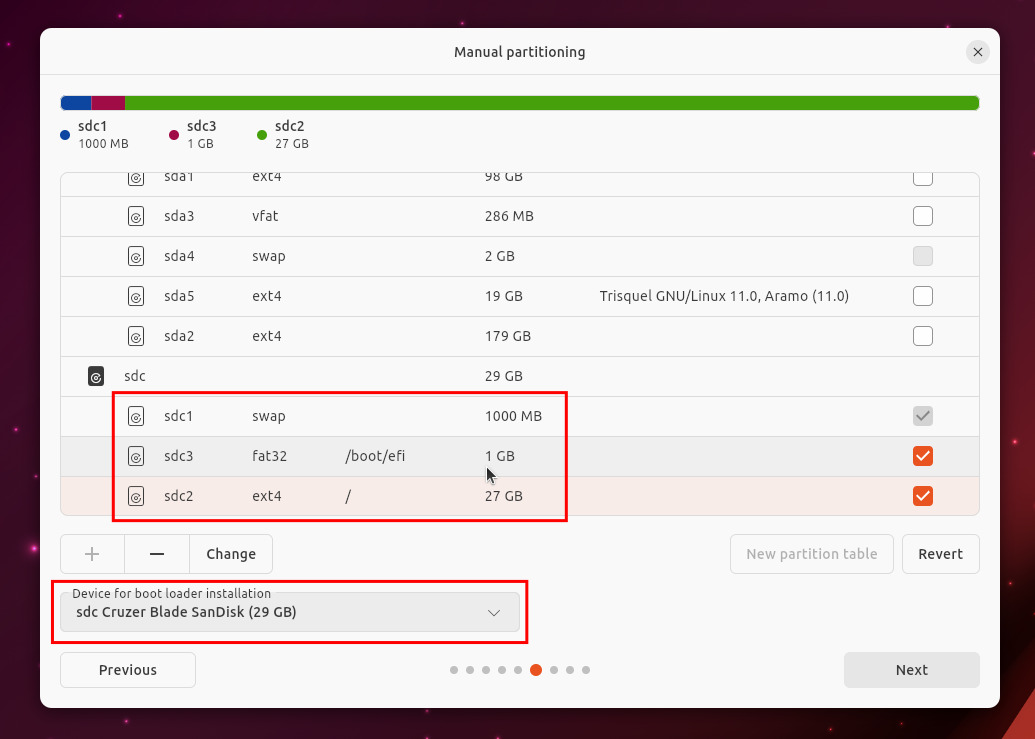
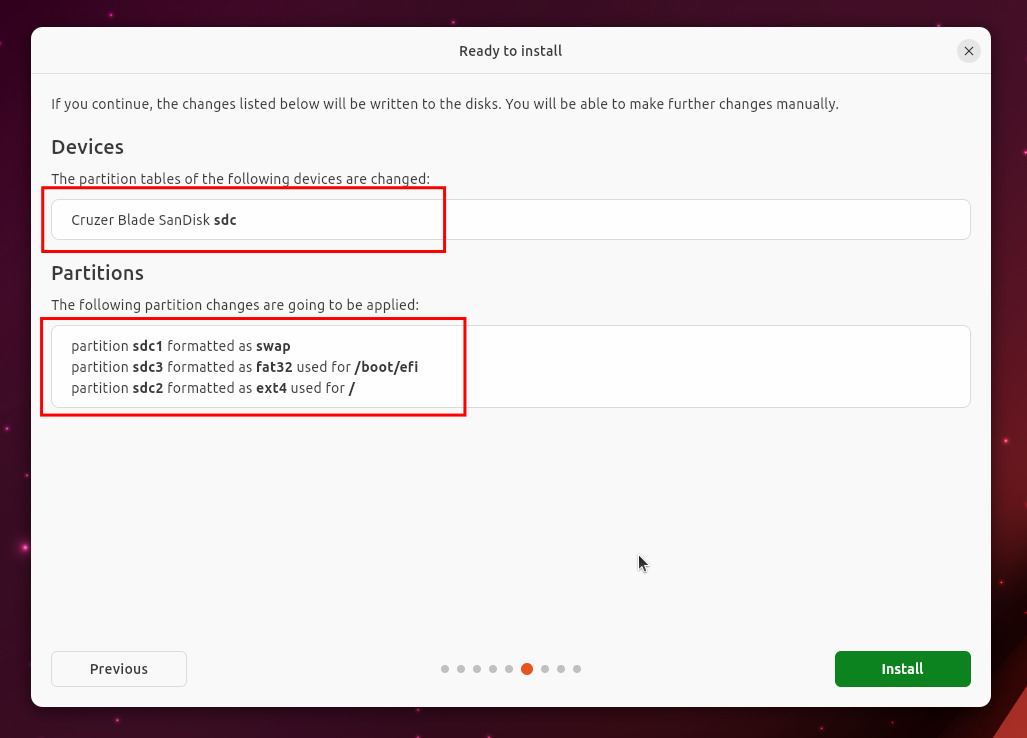
Evaluate the summary:
1. A summary of installation plan will show. It reads which drive to be formatted, and what partitions to be created.
2. Please evaluate and make sure everything is correct.
3. Click Install (the green button).
Continue to step 7.
Step 7. Username Creation and Miscellaneous
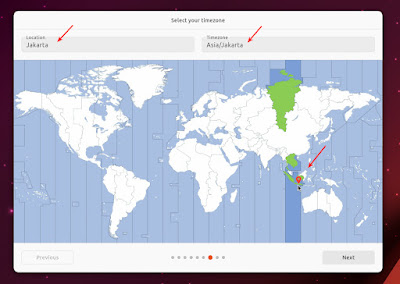
1. A world map will show.
2. Select your timezone. This will determine your time, calendar, currency and numbering formats. For example, we select Asia/Jakarta. Click Next.
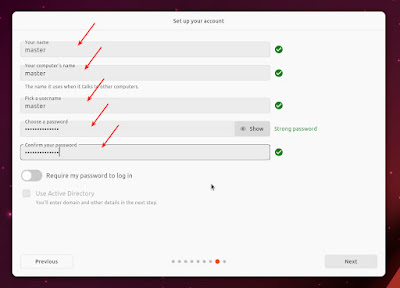
3. A username creation will show.
4. Create your own username, password, hostname and determine whether to login automatically or not. Click Next.
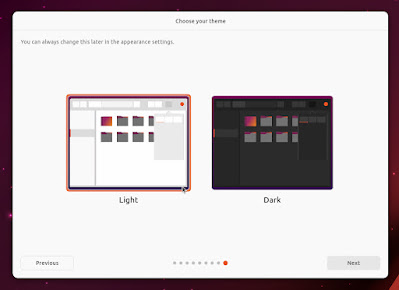
5. A theme selection will show.
6. We recommend you select Light Theme. It's always a good advice to start with the lighter one. Click Next.
Continue to step 8.
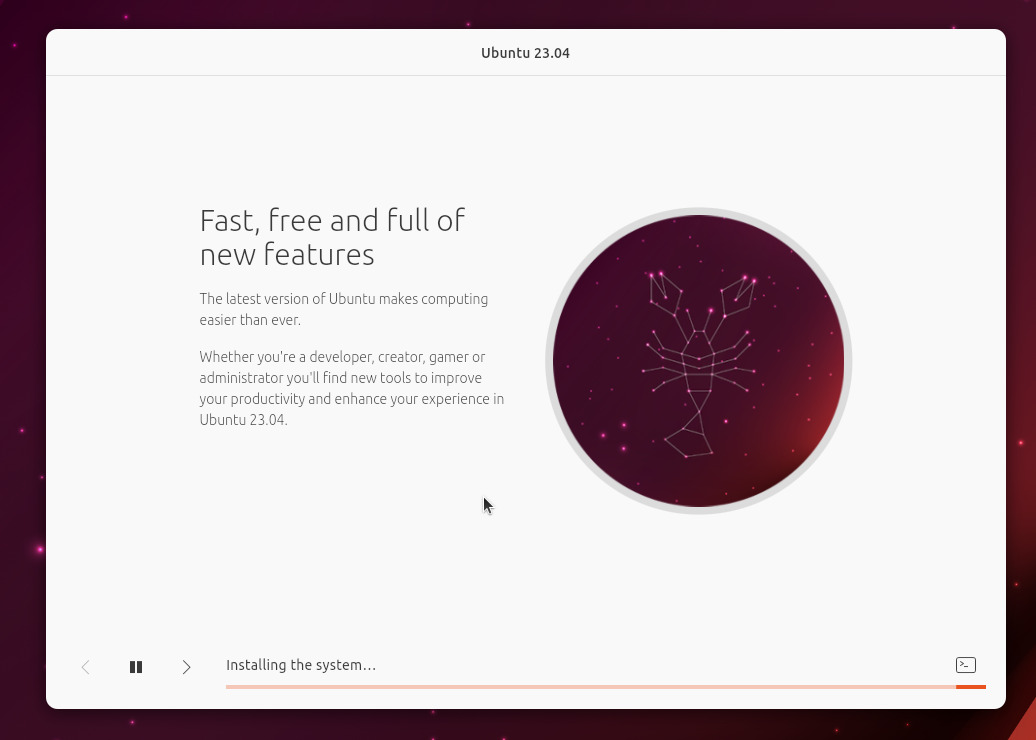
Step 8. Wait and Finish
Wait for the process to take place. In our benchmark, this surprises us as it is faster now, it finishes in under 30 minutes while some previous releases may exceeded that time frame.
Once finished, Installation Complete will show. Click restart Now (green button). This will turn your computer off, show a black screen with Ubuntu logo, and a message for you to remove the installation media and press Enter.
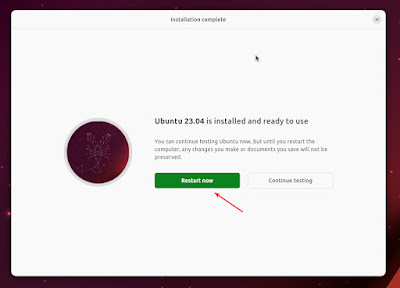
Your computer will reboot. Once booted up into the new installation, you will get the final result.
Final Result
Ubuntu 23.04 "Lunar Lobster" is ready for you. Congratulations!

This article is licensed under CC BY-SA 3.0.