
This tutorial will explain how you can start software development with CodeBlocks with wxWidgets Framework and GUI designer wxSmith. Aimed for beginners, this is an expansion of our alternatives to Visual Basic, Studio or Delphi. We hope this could help, support and enable everyone to Free Libre Open Source Software development. Now let's start.
Subscribe to UbuntuBuzz Telegram Channel to get article updates.
CodeBlocks Basic
- To save everything: click menu File > Save Everything (Ctrl+Shift+S)
- To Build: click menu Build > Build (Ctrl+F9)
- To Run: click menu Build > Run (Ctrl+F10)
- To show/hide bottom panel: click menu View > Toolbars > Logs (F2).
- Project directory: by default, it is /home/ubuntu/Projects given that ubuntu is your username.
- Project file name and extension: it is programName.cbp given that programName is your program name.
Getting Started to the User Interface
A standard CodeBlocks window consists of the following parts:
- Top: titlebar, menubar and detachable toolbars.
- Left: management panel with projects and resources viewers (top) and properties inspector (bottom).
- Right: empty, except when GUI designer enabled it shows GUI insert/delete/preview tools.
- Center: code editor and/or GUI designer (can be displayed side by side).
- Bottom: output panel and statusbar.

Create a New Project
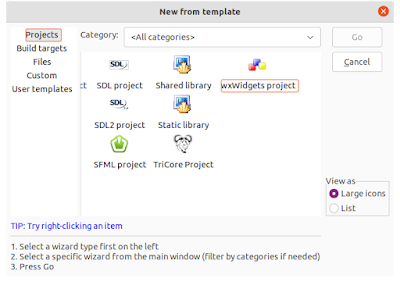
1. Click menu File > New > Project > New from template dialog will open.
2. Select wxWidgets project (usually at the end of list) > Go > wxWidgets project dialog will open.
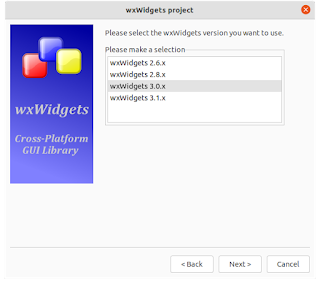
3. First page, click Next > second page, select wxWidgets 3.0 > third, give project name myGuiProgram > fourth, enter your name as the author of this program > fifth, select wxSmith as the Preferred GUI Builder > sixth, select GNU GCC Compiler as the Compiler > seventh, select Use default wxWidgets configuration as the Library Settings > finish > a new project created.
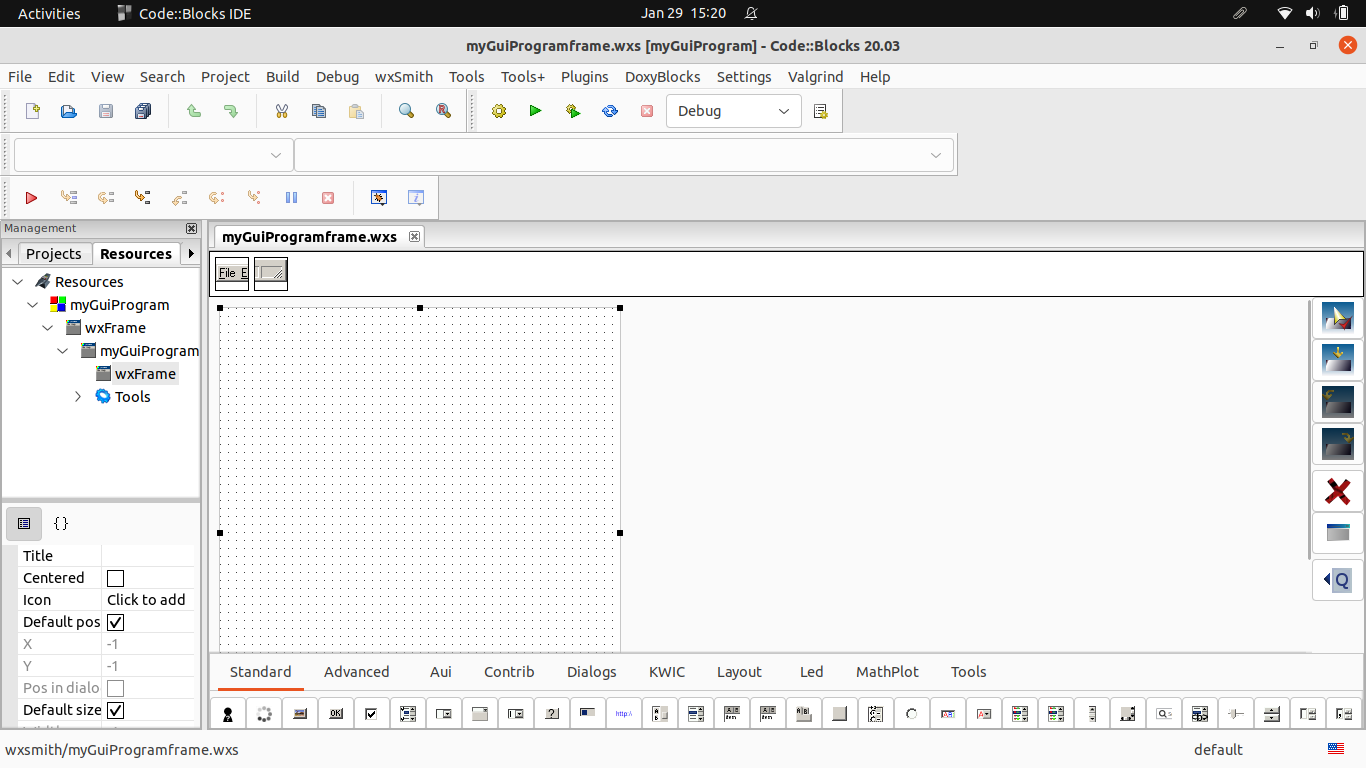
4. Below is CodeBlock with its GUI designer visible.
5. You can start your creativity by adding up buttons, menus, labels etc to the form.
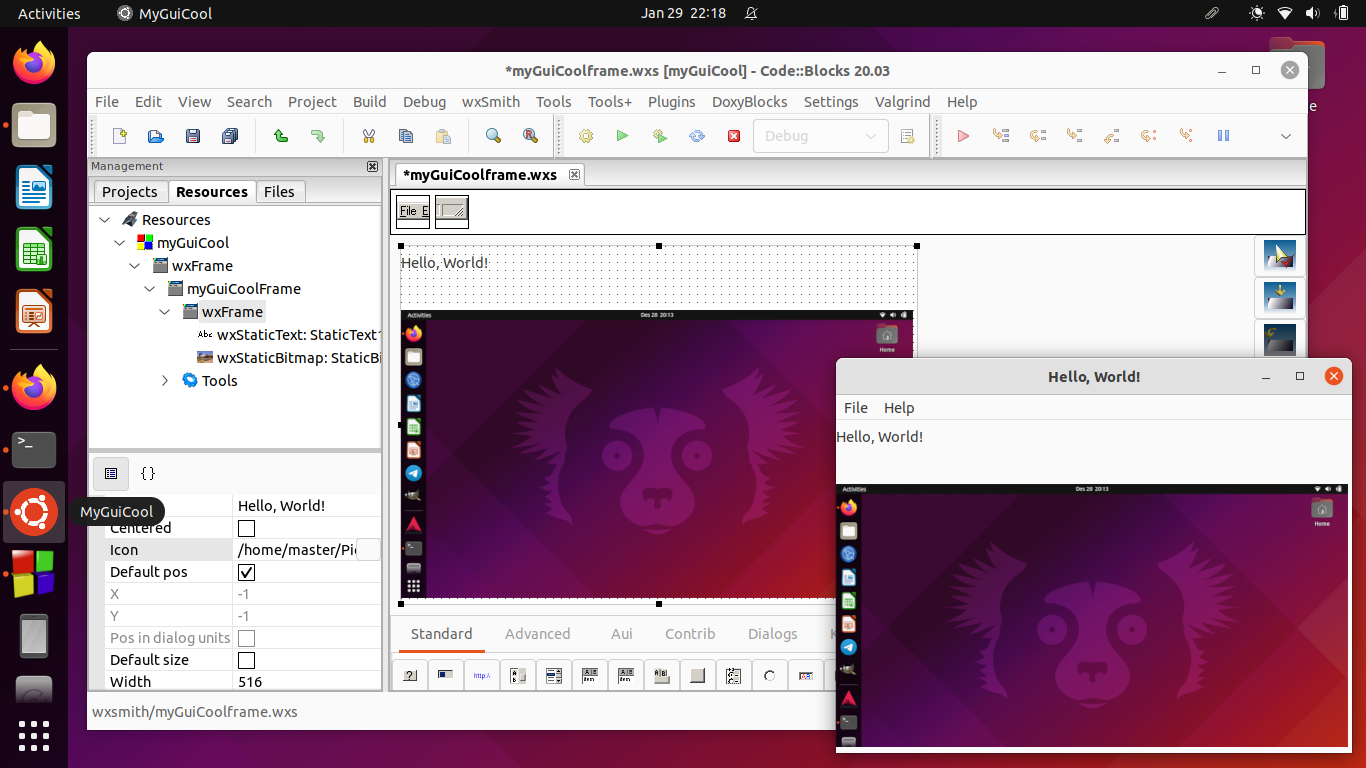
Adding "Hello, World!" Message and a Picture
We will make a simple window program with title Hello, World!, with Ubuntu logo as the program logo, a text label saying "Hello, World!" on it, and display an Ubuntu picture on the rest of window. As simple as that.
Firstly, click the form so you see 8 black points surrounding it. Look at the Properties box on the bottom left, change the Title into Hello, World!. See Icon variable below it? Click the value button beside, Image Picker dialog will open, select Image from file, and choose an Ubuntu logo then OK.

Secondly, find wxStaticText on the long buttons palette at the bottom. Click it, then click the form, you added a blank text label. To change the text, select the label, then look at Properties, do you find Label variable? Change its value to "Hello, World!" without quotes. You made a text message.
Note: because wxWidgets provides so many widgets, the palette became very long and many widgets not visible by default. To see them, carefully hover your pointer to bottom point of the palette and drag the thin horizontal scrollbar to right.

Thirdly, find wxStaticBitmap on the palette. Click it, then click the form, you added a blank container of picture. To insert a picture, select it, then at the Properties, click the value button of Bitmap variable, point it to a picture of Ubuntu. You display a picture.

Finally, Build and Run your program. Now you should see your program title Hello, World!, with Ubuntu logo as its logo, display a message saying "Hello, World!", and display a screenshot of Ubuntu.
Further Learning
To study more about C++ programming with CodeBlocks, you can start right from CodeBlocks wiki Hello World Tutorial.
Happy hacking!
This article is licensed under CC BY-SA 3.0.