
This tutorial will explain step by step to install Parabola computer operating system with GNOME Desktop to a virtual machine. Let's practice!

Subscribe to UbuntuBuzz Telegram Channel to get article updates.
About Parabola
Parabola is a Latin American computer operating system and a GNU/Linux distribution that is completely free software, continuously evolving new software versions aka rolling release and is based on another very popular and powerful GNU system called Arch Linux. Among the choices of completely free OSes, Parabola is the only one that offers the most number of packages and the most up to date on software versions. Its official website is located at https://parabola.nu.
Advantages of Parabola:
- Available for 32-bit and 64-bit computers.
- Can run on computer as old as Intel Pentium / AMD Athlon with 500MB memory.
- Lightweight and fast by default.
- Latest software packages' versions everyday. This is the real difference to Ubuntu.
- Tens of thousands free software packages for all human computing purposes including office suites, utilities, multimedia tools, education and software development applications and games.
- For example, these mean one can empower and revive his old computer, as old as possible, with latest software packages, as new as possible, and without trampling his full control away from his own computing.
- Respects your freedom, security and privacy unlike Windows and MacOS.
For Whom This Tutorial Is
This tutorial is based on Parabola's official installation guide. Thus, this is for computer users in general and Ubuntu users in particular who are already accustomed to GNU/Linux command lines and directory structure. You can practice this tutorial on AQEMU mainly, and if you don't use it, you can alternatively use another virtual machine like VirtualBox or Xen or Virtual Machine Manager.
If you are not accustomed to command lines, please do not practice this to your computer but instead first learn, practice and exercise a lot with command lines. You can start off by reading our Beginner's Guide.
Basic Knowledge
We will install Parabola with the following configuration:- Computer: a virtual machine made by AQEMU
- ISO: parabola-2021.08.11-dual.iso (systemd, not OpenRC)
- CPU: 2 cores
- RAM: 1500 MB
- Network: automatically provided by AQEMU (gns3)
- Booting mode: BIOS Legacy
- Partition table: msdos (aka MBR)
- Hard disk: /dev/sda
- Filesystem type: ext4
- Root filesystem: /dev/sda1
- Disk size: 20 GB
- Kernel: linux-libre-lts
- Swap partition: -
- EFI partition: -
- Hostname: master
- Administrator user name: root
- Administrator password: master
- Normal user name: master
- Normal user password: master
- Init: systemd
- Desktop: GNOME 41
- Display server: Wayland
- Display manager: GDM

How To Play
Because we will install an OS inside a VM using AQEMU, you should prepare yourself to these things:
- TAB key, to automatically complete a command, a name, or an email address.
- View > Display Scaling ON, to view whole screen without scrollbars if you enabled single-window mode.
- View Reinit VNC, when the screen is not responding, do this.
- Send Keys > Clipboard, when you need to copy and paste a command line from the host's web browser into the guest's terminal.
- Send Keys > Ctrl+Alt+F1/2/3/4/5/6/7, when you need to switch between seven terminals.
Booting
1. Run AQEMU virtual machine program.
2. Start your Parabola virtual machine in it.
3. Select the first option on the boot screen when you see a tiger cartoon.
4. Parabola black screen will show by a welcome message and a command line shell.
5. You are ready to continue next step.

Step 1. Preparations
After successfully booted into Parabola's black and white welcome screen, we will do these preparations all done by typing a command and pressing Enter multiple times as the following.
Your first command is to initialize Parabola's keyring:
# pacman-key --init
Then refresh Parabola's repository data:
# pacman -Syy
Then install Parabola's necessary keyrings:
# pacman -S archlinux-keyring parabola-keyring
Then populate the keyrings:
# pacman-key --populate archlinux parabola
To this point, you are ready to continue next step.

Step 2. Disk Setup and Mount
After finishing preparation step, now we will format the hard disk, not your physical but the virtual one inside AQEMU, as the storage for Parabola system as following. You should be accustomed already to fdisk command before doing this.
First, format the hard disk using fdisk by doing (1) write msdos partition table to it (2) create a partition (3) give boot flag to that partition (4) write changes to disk (5) quit fdisk command.
# fdisk /dev/sda
Then format the partition, not the hard disk, as EXT4 Journaling Filesystem.
# mkfs.ext4 /dev/sda1
Then mount the newly created partition into the necessary folder.
# mount /dev/sda1 /mnt
To this point, you are ready to continue next step.
Step 3. Configure System Externally
The genius of GNU/Linux technology is its system installation: it is actually just a folder that is connected to a disk partition, then via the live system we put necessary software packages that constitute an operating system inside the folder, then we configure this folder to become a functional operating system from the outside and inside, finally we leave that folder, resulting in an installed computer operating system stored in the disk. This is more or less what people call bootstrapping in computing and the tools we use to do bootstrapping are pacstrap from the outside and arch-chroot from the inside. This step requires internet access.
First, install the minimum system into the folder. Please note that we use systemd so we use 'base' only without additional packages.
# pacstrap /mnt base
Then, optionally we install additional systemd-based base into the folder.
# pacstrap /mnt parabola-base
Then, we install Parabola's kernel that is linux-libre-lts. We do not need to install any other kernel.
# pacstrap /mnt linux-libre-lts
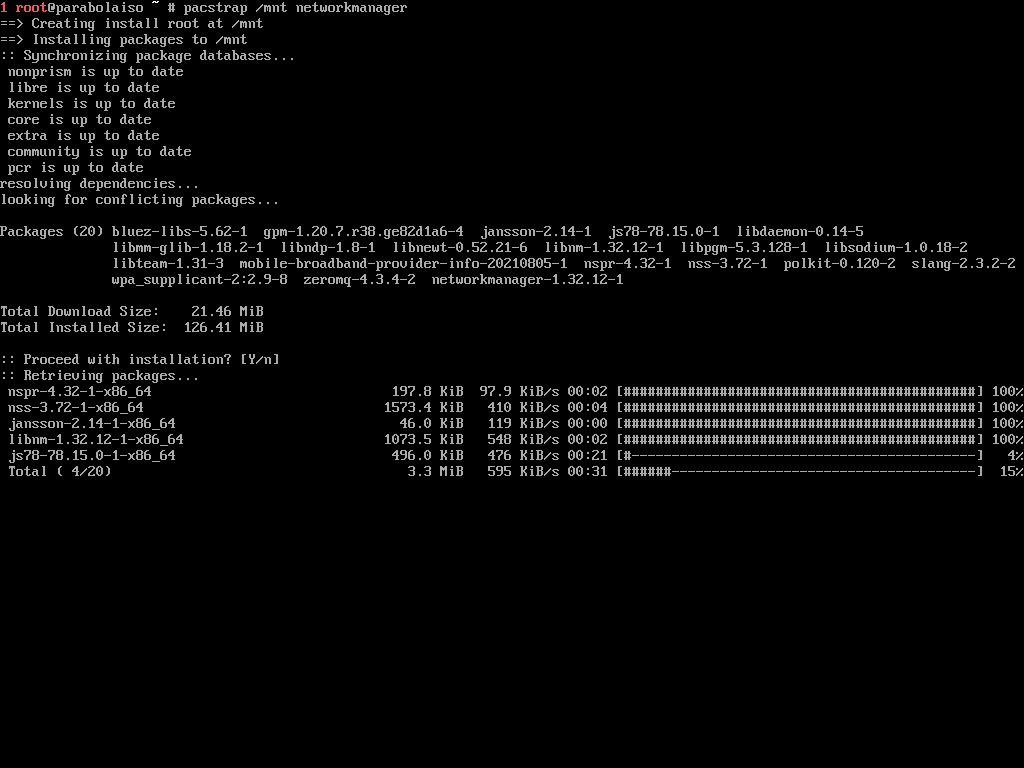
Then, we install Network Manager. It is necessary for Parabola to connect to the internet.
# pacstrap /mnt networkmanager
Then, we install GRUB bootloader. It is necessary for Parabola to boot up.
# pacstrap /mnt grub
Then, optionally we install wpa_supplicant. It is necessary for Parabola if installed to a laptop with wifi.
# pacstrap /mnt wpa_supplicant dialog
To this point, you are ready to continue next step.
Step 4. Configure System Internally
After finished configuring Parabola externally, now we will configure Parabola internally as the following.
First, generate filesystem table file. It is necessary so that Parabola can recognize your hard disk partitions.
# genfstab -p /mnt >> /mnt/etc/fstab
Then, we enter the inactive, not-yet-installed Parabola system.
# arch-chroot /mnt
Then, we setup Parabola's hostname.
# nano /etc/hosts
----------------------------------------------------------------------
127.0.0.1	localhost
::1		localhost
127.0.1.1	master.localdomain	master
Then, we setup the same for the second necessary place. This is necessary because we use systemd and not OpenRC.
# nano /etc/conf.d/hostname
----------------------------------------------------------------------
master
Then, we setup a timezone. Change Asia/Jakarta with yours e.g. Asia/Tokyo
# ln -sf /usr/share/zoneinfo/Asia/Jakarta /etc/localtime
Then, we generate a necessary system file called initramfs that accompanies the kernel and bootloader otherwise your Parabola system will not boot.
# mkinitcpio -p linux-libre-lts
Then, we install GRUB bootloader to your virtual hard disk.
# grub-install /dev/sda
Then, we generate configuration file of the GRUB bootloader based on commands above.
# grub-mkconfig -o /boot/grub/grub.cfg
Then, we create password for su command or root username that will be used later.
# passwd
Then, we create a normal user by username:master and password:master.
# useradd -a -m master
# passwd master
Then, we add the normal user to system's groups like wheel, root, audio, video and network.
# gpasswd -a master wheel
# gpasswd -a master root
# gpasswd -a master audio
# gpasswd -a master video
# gpasswd -a master network
Then, once again we install Parabola's keyrings. Please remember that this does not install the keyrings into the live system, but the system being installed we are currently in.
# pacman -Sy archlinux-keyring parabola-keyring
Finally, full upgrade Parabola.
# pacman -Syu
To this point, you finished all the required bootstrapping processes. You are ready to continue next step.

Step 5. Finish System Installation and Restart
After finished the bootstrapping processes, now we finish the system being installed to be ready to use.
First, we exit from the folder we were in and back to live system. Please notice the red shell of the Parabola live system as the sign thet you have successfully exited.
# exit
Then, we unmount (disconnect) the folder from your virtual hard disk.
# umount /mnt
Finally, we restart the virtual machine.
# reboot
To this point, you finished the whole Parabola installation. You are ready to add GNOME Desktop Environment next step.

Step 6. Post-install and Setup GNOME Desktop
To this point, you have a ready to use Parabola system. You can already use it non-graphically by using command lines, for example, installing some programs, playing audio and web browsing in text mode. However, as you can see it is still "barebone" or without usable desktop environment. To have Parabola Desktop, we should install a desktop, and we choose GNOME here to respect The GNU Project's history.
Check your network interfaces:
# ip link
Enable your network interface:
# ip link set gns3 up
Give working IP address and DNS to your enabled network interface:
# dhcpcd gns3
Test your internet access:
# ping -c 3 gnu.org && ping -c 3 parabola.nu && ping -c 3 gnome.org
Start keyring initialization once again:
# pacman-key --init
Refresh Parabola's repository data once again:
# pacman -Syy
Install Parabola's necessary keyrings:
# pacman -S archlinux-keyring parabola-keyring
Populate Parabola's keyrings:
# pacman-key --populate archlinux parabola
Install complete GNOME Desktop Environment:
# pacman -S gnome
Start gdm login screen to login to GNOME. Please notice systemctl is part of systemd.
# systemctl start gdm
Finally, login to Parabola Desktop with username:master and password:master then you should see your computer ready to use with Parabola GNOME Desktop System.
Congratulations!

Final Result
Below is Parabola GNOME Edition.

Troubleshooting
If you encounter errors in general and GPG keys in particular, please refer to the three online documentations namely
Acknowledgement
Bill Auger and Denis Carikli, both are Parabola developers, from #parabola chatroom at Libera Chat helped me greatly and so patiently installing Parabola after one week of failure. We say thank you to Parabola community in general and both developers in particular.
This article is licensed under CC BY-SA 3.0.