
This tutorial explains the installation of deepin 20 computer operating system. You and everybody can practice this tutorial in any case whether it is single or dualboot, with or without UEFI, normal or into external hard disk drive. You can even practice the installation not to HDD but a usb flash drive instead. However, deepin 20 is different to Ubuntu as the installation needs noticeably longer time to finish and has some unique traits so you need to be aware and can learn in this tutorial. Finally, have a happy installation and enjoy working!

Subscribe to UbuntuBuzz Telegram Channel to get article updates.
Preparations
- 1) Create bootable media.
- 2) Prepare disk partitions.
- 3) Boot into usb.
1) Download deepin 20 and burn the iso image file into a flash drive as bootable media. If you do not have the iso, download here. If you don't have the idea how to make bootable media, learn here.
2) Format your target hard disk or any other storage media into three partitions like picture below. If your computer or laptop is not UEFI but only BIOS Legacy, then EFI is not necessary, so format only two latter ones.

3) Boot your computer up so that you run deepin bootable media into the installation.
Session I
- 1) Select language and accept agreements.
- 2) Create partitions.
- 3) Wait the process.
First
Select language English and accept all three agreements. Go next.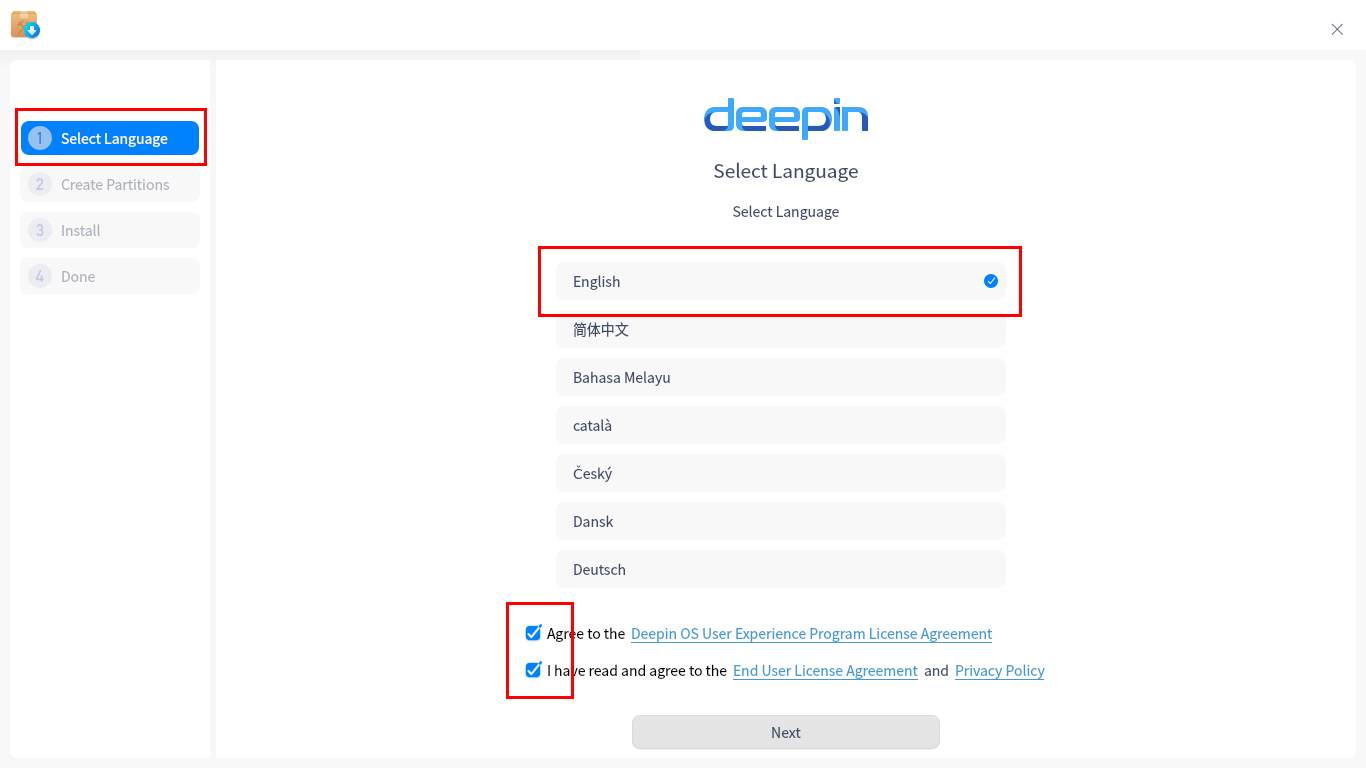
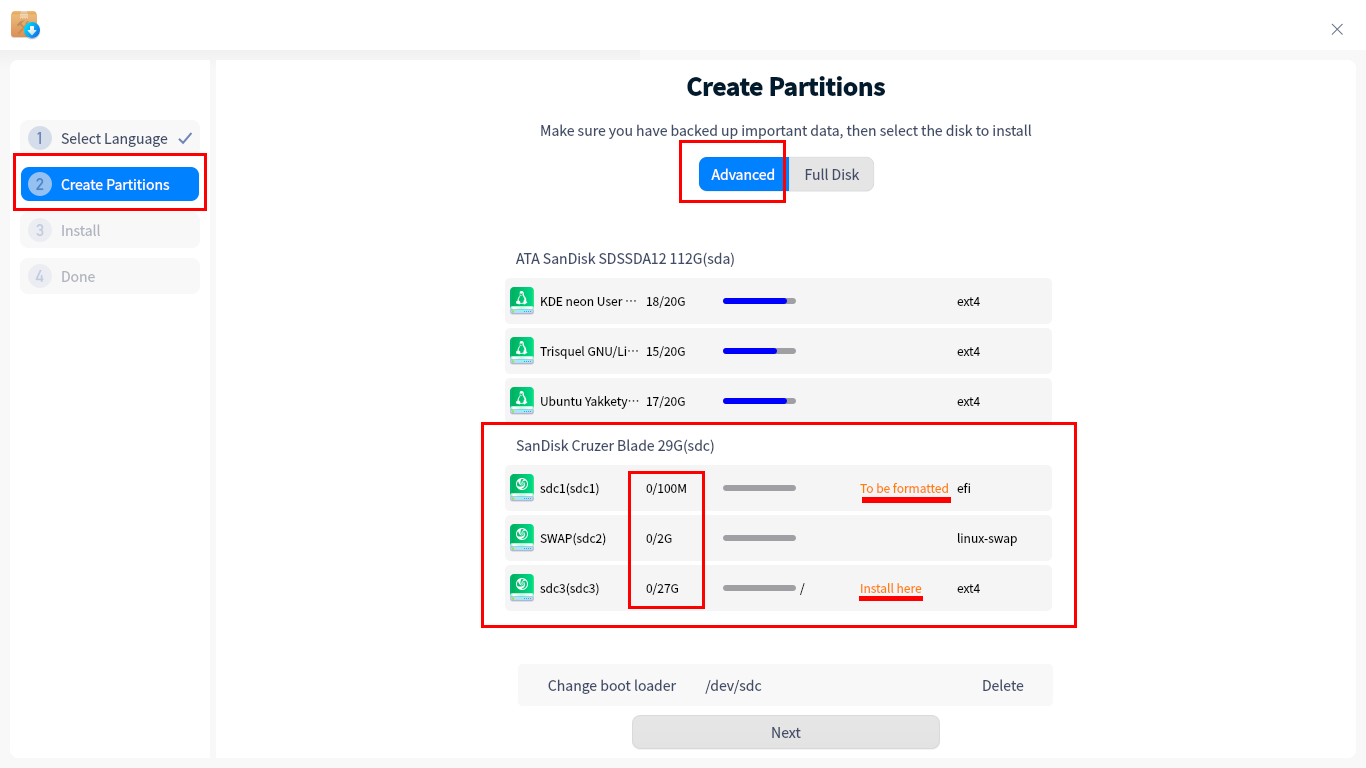
Second
Create disk partitions.- 1) Create EFI partition.
- 2) Create SWAP partition.
- 3) Create ROOT partition.
- 4) Continue.
Picture a:
This tutorial makes an example of installing deepin 20 into an external storage usb flash drive. It is no different to installing it normally or to another external storages so don't worry. For that purpose, this uses the three partitions created beforehand so they become EFI, SWAP, and ROOT partitions for deepin operating system. However, if your computer is BIOS and not UEFI, you only need to create the latter two partitions.
This is how the final partitioning should look like.
1) Create EFI Partition
Picture b:
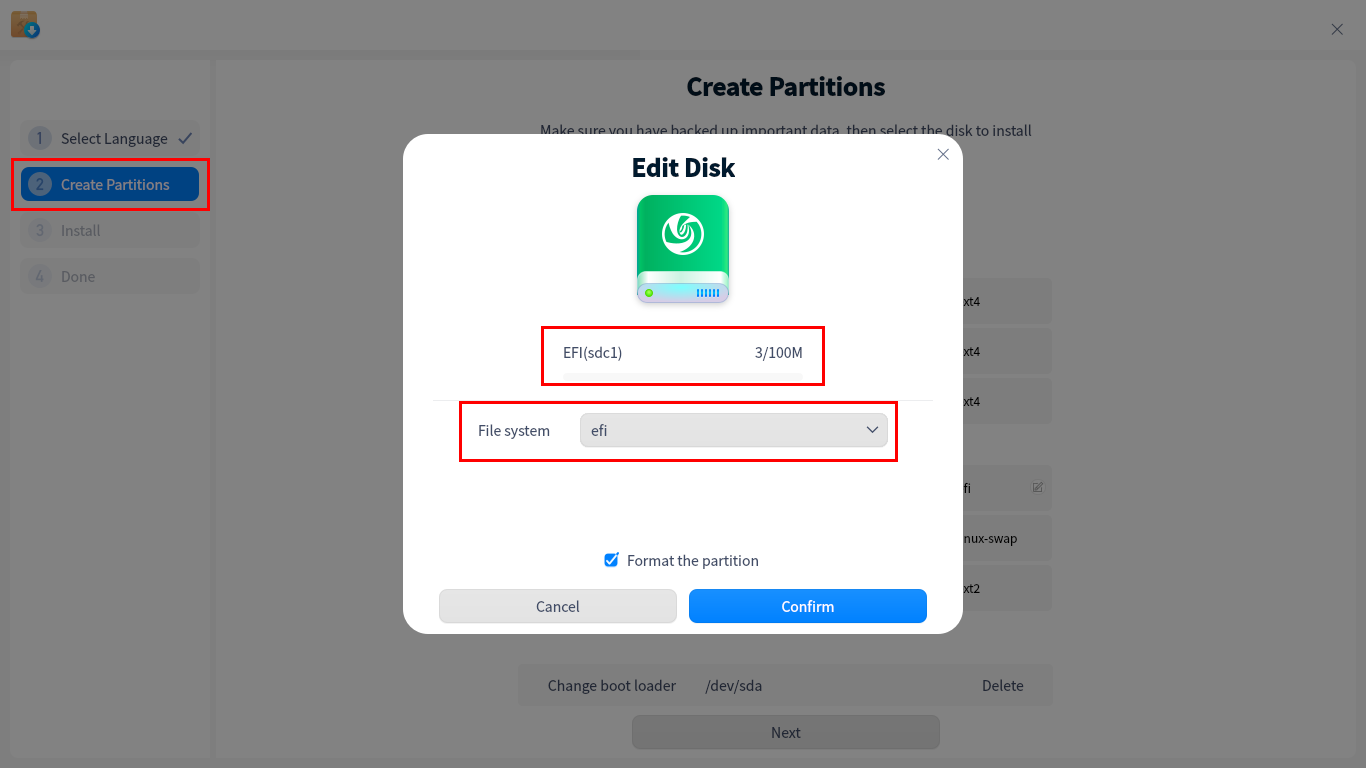
Creation of 1st partition by 100MB small with EFI type. Do not create this if your computer or laptop is not UEFI.
2) Create SWAP Partition
Picture c:

Creation of 2nd partition by 2GB small with SWAP PARTITION option.
3) Create ROOT Partition
Picture d:

Creation of 3rd partition by >=20GB big with either EXT2 or EXT4 option and with / mount point. Remember EXT2 is for usb flash drive and EXT4 is for hard disk.
4) Continue
After finished making all required partitions, click Next.
Third
Wait the installation process to finish. I find this took time around one hour for this First Session.
Fourth
Finished installing the operating system. Now you will restart, unplug the installation usb, and continue to the Second Session of the installation.
Session II
- 1) Select keyboard layout
- 2) Select timezone
- 3) Create your username and password
After rebooting, you still need to finish the Second Session of the installation. First, select your keyboard layout (for the second time). Second, you select your timezone e.g. mine is Asia/Jakarta. Third, you create your desired username and password. Remember that the password here is strict (even stricter than Ubuntu's) as it must contains special character and number otherwise you may not continue. I suggest to try password @20DeepinSystem or similar and later on you can still change it anyway to your preference. Finally, computer will tune in everything to finish whole installation and you wait for about fifteen more minutes. You do not need to restart again here.
Finish
Once Second Session finished, you will be asked to login, and congratulations! You have a new computer living with deepin 20 GNU/Linux operating system. Enjoy!
This article is licensed under CC BY-SA 3.0.