
This tutorial will explain how you can recognize, show, find, add and remove, and use fonts on Ubuntu computer. This includes basic understanding with examples of Times New Roman, Liberation Serif, and Apple Garamond. This also includes how to install non-Latin fonts like Arabic, Japanese, and Chinese ones. Now let's practice.
Subscribe to UbuntuBuzz Telegram Channel to get article updates.
See also our Ubuntu Full User Guide
Basics of Fonts
In general, fonts are divided into three classes namely Serif, Sans, and Mono.
- Examples of Serif fonts are Times New Roman, Liberation Serif, and Apple Garamond.
- Example of Sans fonts (also known as sans-serif) are Arial, Liberation Sans, and Helvetica.
- Examples of Mono fonts are Courier New, Liberation Mono, and Monaco.
As the examples appear to you, Serif family fonts look "sharp" with its pointy "thorns" on every character (in Latin, serif), while Sans family fonts look "dull" without "thorns" (hence they're called sans-serif or no-thorns), while Mono family fonts look "square-y" also known as "typewriter" machine style.
Furthermore, fonts also divided into two forms namely Bold and Italic, as we all knew, "thick" and "slanted" writings. Because of that, you will find combinations in every single font. In other words, every single font is divided into several files with each one serving a specific writing purpose. Take example Liberation Serif:
- LiberationSerif.ttf
- LiberationSerifBold.ttf
- LiberationSerifItalic.ttf
- LiberationSerifBoldItalic.ttf
That's the basics of fonts.
Ubuntu Built-in Fonts
Ubuntu bundled its own fonts, which are high quality and complete, and they are all Free Libre Open Source Software licensed (FLOSS). The fonts included by default in Ubuntu are of course different to other operating systems, just like Windows' bundled fonts are different to MacOS' bundled fonts. The clearest difference is that Ubuntu's fonts are FLOSS, you may use and copy them freely without restrictions including for commercial purposes while Windows' and MacOS' fonts are not (also known as proprietary software).
- DejaVu: Serif, Sans, Mono.
- Droid: Serif, Sans, Mono.
- FreeFont: FreeSerif, FreeSans, FreeMono.
- Liberation: Serif, Sans, Mono.
- Noto: Sans, Serif, Mono.
- Ubuntu: Sans, Mono.
Show Installed Fonts
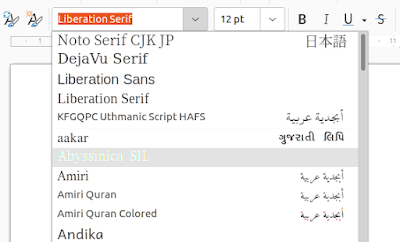
There are various ways to tell what fonts installed on our computer system. The most popular way is to check them out with word processor program. On Ubuntu, you can do that by running LibreOffice Writer then check out the Fonts selection.

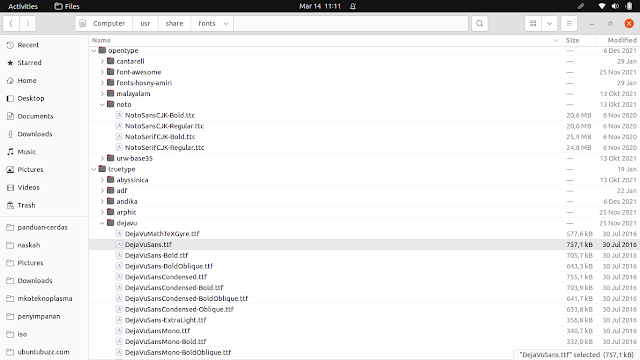
Lastly, compared by filesystem Ubuntu stores all fonts at /usr/share/fonts, while Windows stores them at C:\Windows\Fonts, and MacOS's are at /System/Library/Fonts.
Open Font
Fonts come in the form of a file with an extension either it's OTF or TTF. For example, Times New Roman would be stored on computer as timesnewroman.ttf and Liberation Serif would look like liberationserif.tty.
To open a font to display its characters set,
1. Get the font file, you can either download or copy it from your neighbors.
2. Double click the font file.
3. Font opened in a window.
Install Font
In general, fonts are part of operating systems. Every operating system has its own set of fonts. That's why Times New Roman is on Windows, Liberation Serif is on Ubuntu, while Apple Garamond is on MacOS. For that reason, in order to use a certain font, you should install it on your operating system first otherwise you cannot use it. This means a font installed on Windows cannot be used on Ubuntu except you install that font on Ubuntu as well, and vice versa.
To install a font:
1. Get the font file.
2. Open font file.
3. Font Manager window will open.
4. Click Install.
5. Font installed.
6. Repeat all steps above to install another fonts.

Install Arabic and other Non-Latin Fonts
For the purposes of writing non-Latin characters like Arabic, Chinese, Japanese and the others, you might need certain fonts suitable for that purposes. For example, to write Arabic text, you should use Arabic font like Amiri Quran.
To install Arabic font,
1. Get the font file.
2. Double click it.
3. Click Install button.
4. Arabic font installed.
5. Repeat steps above for the other non-Latin fonts.

Remove Font
On Ubuntu, fonts installation is divided into two places:
User: ~/.local/share/fonts/
System: /usr/share/fonts/
To remove fonts installed on User directory:
1. Run Files.
2. Go to ~/.local/share/fonts/.
3. There, you should see files with .ttf or .otf extensions.
4. Find the fonts you want to delete.
For example, if you installed Amiri Quran then want to delete it, then select AmiriQuran.ttf file and Delete.
5. Repeat steps above to remove another fonts.
To remove fonts installed on System directory:
1. Run Files.
2. Go to /usr/share/fonts/.
3. Right-click empty area > Open in Terminal.
4. Terminal will open at that directory.
5. Find the fonts you want to remove with basic command lines.
6. Carefully use sudo and rm commands to delete that fonts.
7. Repeat steps above to remove another fonts.
Afterwords
That's all. To this point, you should have the knowledge to recognize, show, add, use and remove fonts on Ubuntu. Not just that, but you also know the built-in fonts on Ubuntu such as Droid, FreeFont, Liberation, Noto, and Ubuntu Fonts itself. Finally, we hope this would be useful for you. See you next time!
This article is licensed under CC BY-SA 3.0.