
This is the 8th part of Inkscape for Students the Series. After we had learned about Cropping in the previous part, now we will learn about vectorization, also known as tracing or simply redrawing. We will practice through examples of the two of vectorization methods, automatic and manual. Now let's start practicing.

Subscribe to UbuntuBuzz Telegram Channel to get article updates.
Introduction
Vectorization in this discussion is the methods used to change any image, usually bitmap, into editable and scalable vector image. This involves two methods, automatic and manual, and both are supported in Inkscape. The result of vectorization is the same image in editable, scalable vector format, that can be saved as SVG file.
Image Sample
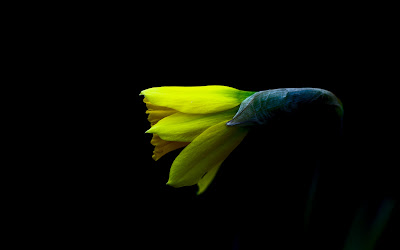
Below is a bitmap image in JPEG format. It's a photo of yellow flower in the dark. As we know, it is not editable, or more precisely, not scalable as it is not a vector image. We will use this bitmap to exercise vectorization. Click here to download flower image JPEG.
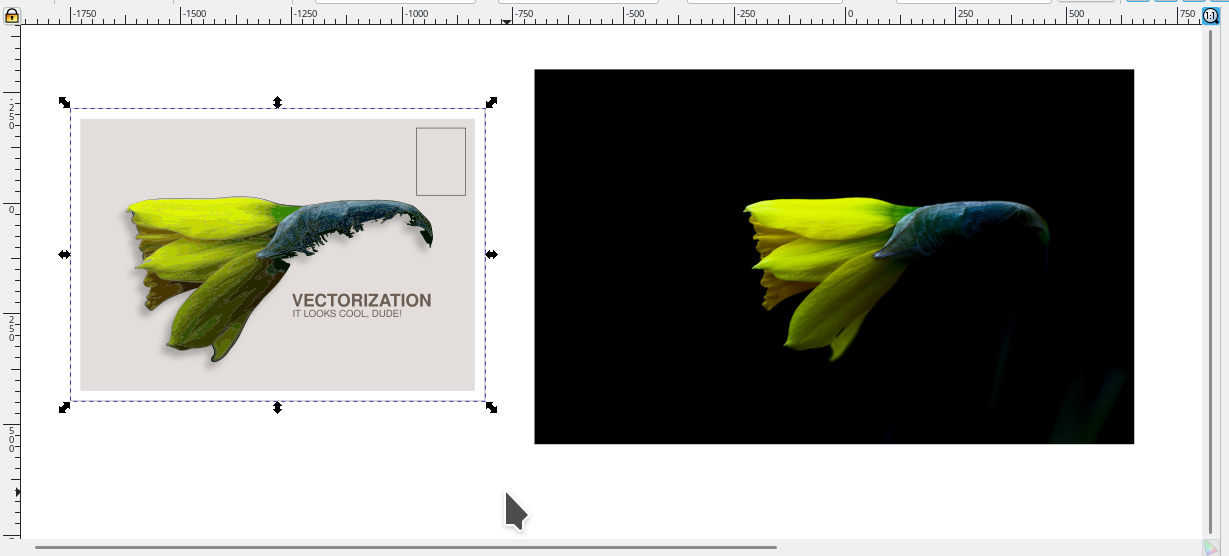
Automatic Vectorization
This is also called Trace Bitmap. For most cases, this is the easiest and fastest method available. In general, Inkscape can trace in two ways, color and black/white.
1. Create new document.
2. Import the flower image into document.
3. Select the image.
4. Click menu Path > Trace Bitmap > Trace Bitmap dialog opened.
5. On the dialog, select Color, insert Scans = 16, select all options except Stack, and let other values as they are.
6. Click Preview to see how the result would look like.
7. Click OK, then wait for a moment, and the resulting vector image will overlay the original bitmap image. Vectorization finished.
8. Close Trace Bitmap dialog.
9. Now you can color, move, resize, rotate, edit the vector image and delete the original bitmap one.
10. Save the document.
Manual Vectorization
This is also called manual tracing, contouring, or even simpler, redrawing. This does not require special menu in Inkscape like Trace Bitmap. This requires patience as you will use a tool by hand to make lines from point to point following the contour of the image.
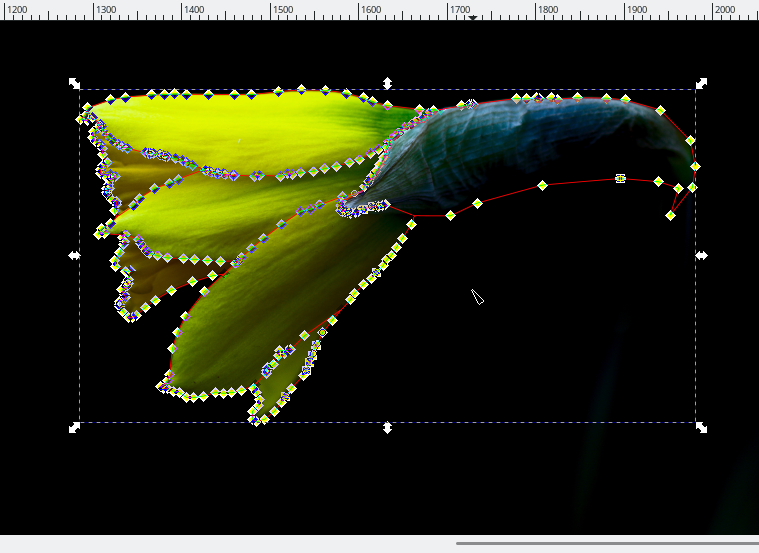
Required tool for this method is Bezier for making lines, Zoom to sharpen your vision, Union and/or Combine to combine lines.
1. Create new document.
2. Import the flower image into the document.
3. Use Bezier Tool. We will start from top to bottom, from left to right direction.
4. Click Bezier and release click on a left most point of the yellow part of the flower. You made the first point.
5. Move cursor down a bit following the flower contour, click Bezier and release click, you made the first line.
6. Do step 5 patiently until you can connect the last point with the first point.
7. Vectorization finished. Now you can color, fill color, move, resize, rotate and edit the vector image then delete the bitmap one.
8. Save the document.
Exercises
These are long-term exercise you may try to enhance your tracing skills.
1. Look for another flower and try to trace it.
2. Look for a car as simple as possible and try to trace it.
3. Which method do you like the most, automatic or manual?
Afterword
That's all for now. You should get a new skill to trace images. Next time we will learn about making effects and drop shadows, which are, the things that made everything look smooth and lovable. Thank you and see you next time!
This article is licensed under CC BY-SA 3.0.