
This tutorial will explain how you can create online forms using CryptPad, a Google Forms alternative from France that respects software freedom and privacy. The forms are beautiful, easy to use, and also suitable for making surveys, registrations, quizzes, polls etc. for education as well as business purposes. Now let's start it.

Form's Features
- Free.
- Easy to use, same features as Google Forms.
- Suitable for registrations, surveys, quiz and other purposes.
- Suitable for teachers, schools and businesses.
- Text answers.
- Paragraph answers.
- Multiple choices.
- If Conditional choices.
- Custom submit message, usable for registration purposes.
- Pictures, links, and markdown-based text formatting.
- Page breaks.
- Polls.
- Expiration date options.
- Public and private options.
- Integrated to CryptPad services including Drive and Spreadsheet (OnlyOffice).
- Privacy, everything is encrypted and based on AGPL software.

Example
In this tutorial, we will create an example registration form of an online course. By practicing this, we hope you can adapt it yourself for other purposes such as surveys and quizzes.
Registration form:

Submit message:

From picture of the form above, we will create a form as the following:
- title: Registration Form,
- description: (see below),
- question 1: Your name* (text entry),
- question 2: Your address* (text entry),
- question 3: Your email* (text entry),
- question 4: Your operating system* (multiple choice),
- question 5: Your GNU/Linux distro* (conditional IF, multiple choice), and
- question 6: Have you downloaded the course material (multiple choice),
- where (*) means required.
Getting Started with CryptPad Form
To use the Form, you should know the tools you will use and among them are:

- TEXT: to add a question with text entry.
- PARAGRAPH: to add a question with long text entry.
- CHOICE: to add a multiple choice.
- CHECKBOX: to add a multiple choice with more than one answer allowed.
- ORDERED LIST: to add a preference choices with higher-lower priority. Useful in surveys.
- DESCRIPTION: to create form descriptions, can be added more than one and placed anywhere among other entries.
- PAGE BREAK: to create another page of a form.
- CONDITIONAL SECTION: to create entries that change depending to prior answers.
Saving:
To save your changes, do an edit and it will automatically be saved, no Save button clicking required.
Deleting:
To delete an entry, click Delete button twice, it will be deleted.
Moving:
To move an entry to another position within entries, click and drag the handle on middle-top of each entry. Moving one to top and to bottom will place that question before and after another question.
Step 1. Register to CryptPad
- Visit https://cryptpad.fr,
- click Sign Up to register an account,
- register with your email,
- login with your account,
- continue next step.
Fortunately, the registration does not use reCaptcha. Later, if you love CryptPad you can register a paid account with much more service features.

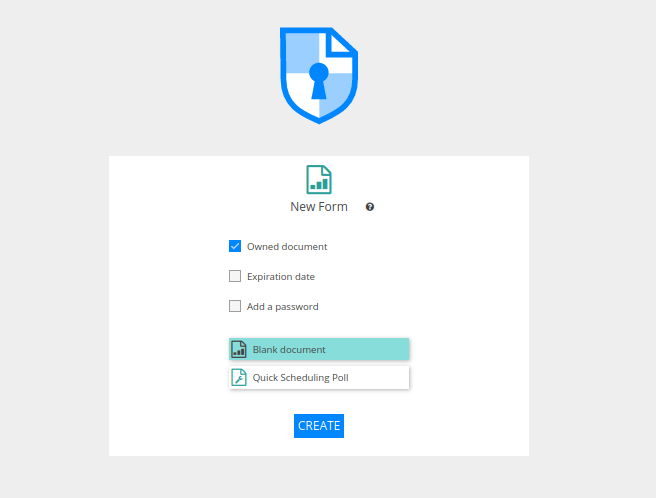
Step 2. Create New Form
Once registered and logged in,
- visit https://cryptpad.fr/form/,
- alternatively, click Form at the main page,
- at New Form page, select 'Owned document' and 'Blank document',
- click Create,
- form creation page will open,
- continue next step.
Step 3. Create Title and Description
Firstly, we will create the title, detailed info about the course, and some rules. This is to inform the respondents so they know for what they'd register.
Starting from the top most of the page,
- edit the title into 'Registration Form',
- remove all entries by clicking Remove on each one,
- add a DESCRIPTION,
- edit the description with your course name, info, registration due date, course materials link, and some rules, (you can add more later e.g. pictures)
- title and description created.

Step 4. Create Questions
Secondly, we create the questions for the respondents to answer:
- add a TEXT,
- edit it as 'Your name: '
- add a TEXT again,
- edit it as 'Your address: '
- add a MULTIPLE CHOICE,
- edit it as 'Your operating system: '

- add a CONDITIONAL CHOICE,
- a blank conditional section will appear,
- under 'Only show this section when', select 'Your operating system:', select 'IS', and select 'GNU/LINUX', then
- click Plus button (+) under it,
- add a MULTIPLE CHOICE,
- create multiple choices as the following:

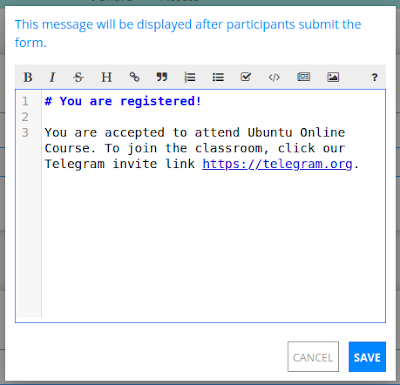
Step 5. Create Submit Message
For the respondents to see a message after they submitted the form, you should create a submit message. Content of this message varies, you can add some congrats, welcome, or further instruction and some link. For example, you can hide the classroom link until participants finished submitting their form by this way.
- look at left side of the form editor,
- click EDIT SUBMIT MESSAGE,
- insert your message e.g. include the classroom's invite link etc. as you wish,
- click Save,
- submit message created.
Step 6. Set Required Labels, Expiration Date and Final Setup
Final preparation is to setup required labels, set expiration date, and some other stuffs.
- edit first question and set Required option,
- repeat it for all other questions
- look at left side, click Set Date, select date, select hour (if needed), OK.
- for any other options left, let them unchanged,
- final setup finished.

Step 7. Test Your Form
Before sending your form to respondents, you should test it first to avoid troubles.
- click COPY LINK,
- open a new private tab > paste link and go > form will be displayed to test,
- edit form if you find a mistake and try to fill the questions yourself,
- submit,
- close private tab window,
- repeat steps from opening to closing private tab as needed,
- test finished.
Step 8. Share it
For respondents to be able to submit, you should share the form's link to them. You can share it via emails, mailing lists, social media, group chats, or any other means you see fit.
- look at the top part of form editor,
- click Share,
- select Link,
- select Access Rights = Participant,
- enable Embed mode (so users will not see unnecessary things),
- copy link, and finally
- publish this link to your participants.

Forms Management
After making forms, you will need to learn how to manage them online as the followings.
Accessing forms: login to CryptPad → open CryptDrive → saved forms will be opened (alongside with other files if any).
Edit existing form: open CryptDrive → right-click a form name → Open →form editor will be opened in a new tab.
Save submission as spreadsheet: open a form → click RESPONSES → Export to Sheet → OnlyOffice Sheet will open in a new tab → your respondents data displayed → you can save it as either LibreOffice Calc (.ods) or Excel (.xlsx) by File menu.

Happy working!
This article is licensed under CC BY-SA 3.0.