
(Successful deepin 15.10 installation result)
This tutorial explains procedures to install deepin 15.10 to external storage such as USB Flash Drive or Hard Disk. This way, deepin can run everywhere you go. You will prepare at least 32GB USB drive, create two partitions, and then install deepin into the larger one. Regarding filesystem type, I highly recommend using EXT2 for flash drive and EXT4 for hard disk (or SSD). Finally, you can also practice this tutorial to deepin 15.11. Enjoy your installation!
Subscribe to UbuntuBuzz Telegram Channel to get article updates directly.
[ Previous deepin releases: 15.8 | 15.7 | 15.6 ] [ My deepin reviews: 2019 | 2018 | 2017 ] [ My deepin tutorials: Bootable | MicroUSB ]
Summary
- 1) Select Language
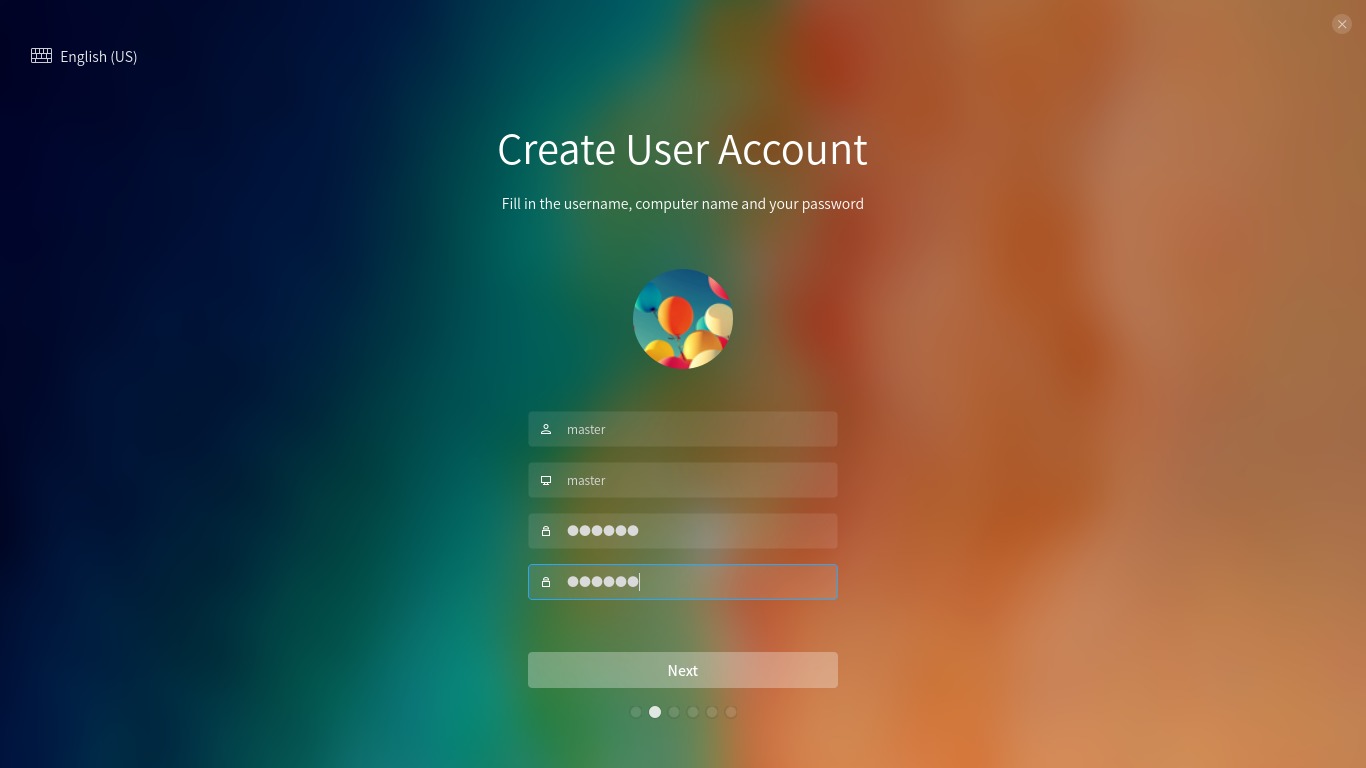
- 2) Create username
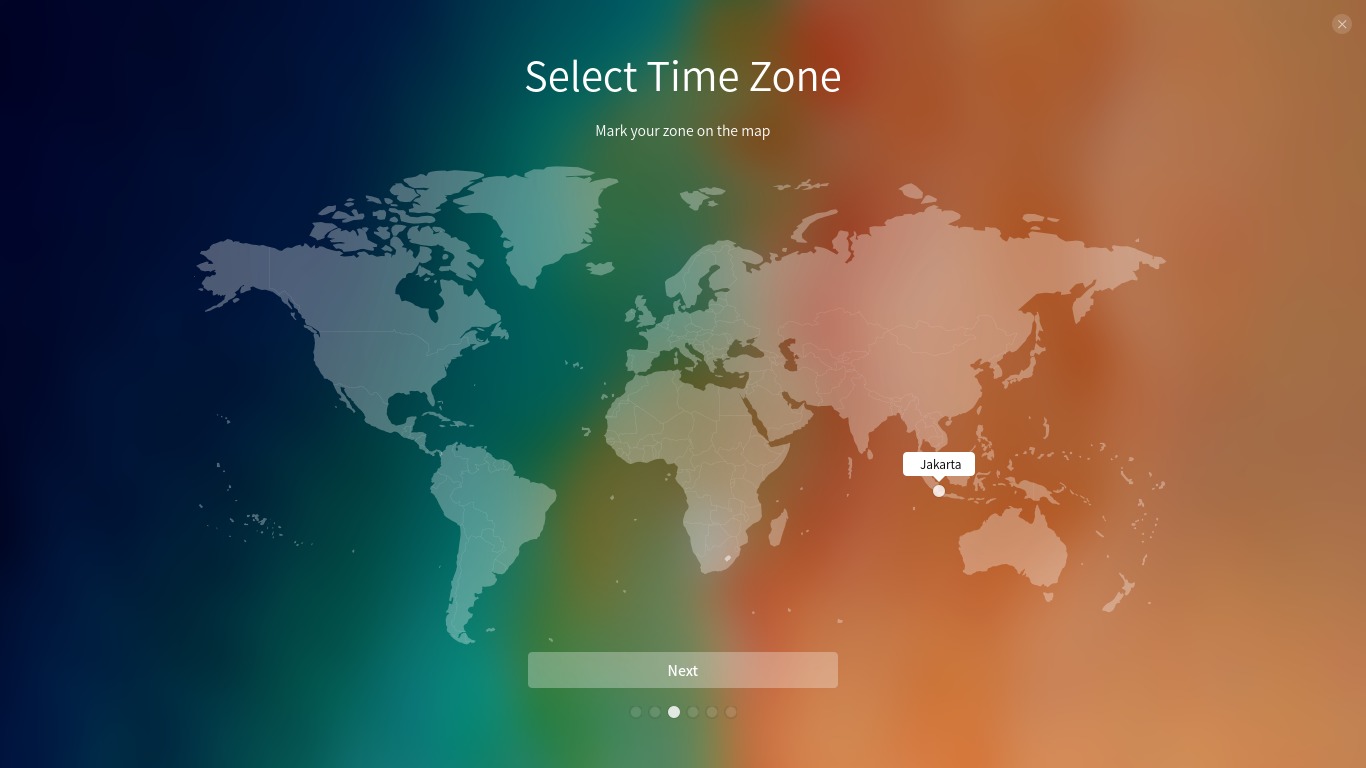
- 3) Select geolocation
- 4) Partitioning
- 5) Waiting & finishing
Preparations
- USB drive capacity
- Boot up
- Disk identifier
First: you must provide at least 20GB free space in the target installation media. deepin cannot be installed to 16GB flash drive. So, for USB Flash Drive, you must have at minimum 32GB one, and for external HDD, it must be at minimum 128GB.
My gears to practice deepin installation to USB stick:
- 32GB SanDisk Cruzer Blade, unformatted
- 16GB SanDisk Cruzer Blade, as deepin LiveCD Installation media
- Acer Aspire One 756, with internal HDD removed
Second: boot up; while booting your installation media, select Deepin Failsafe, so you enter the LiveCD mode of deepin.

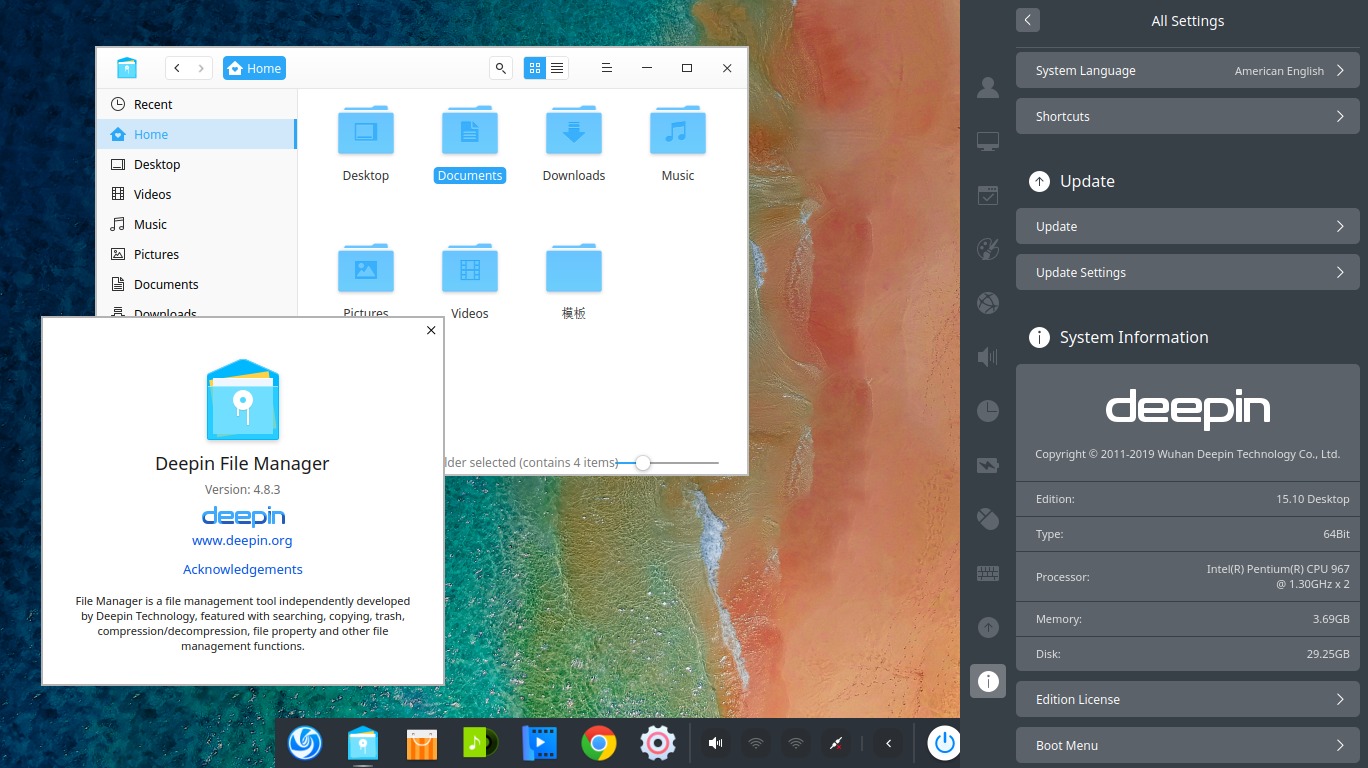
Third: know the identity of your USB drive: on deepin LiveCD session, go to start menu > find GParted Partition Editor > run it > find your USB drive. For instance, my USB drive is identified as SanDisk Cruzer Blade /dev/sdb 29.25GB on my system.

Step 1: Select Language
Choose English and give check mark to "I accept the license"*.

*) For you interested in free software licensing, read GPL FAQ in ClickThrough section about this. deepin is still a GNU/Linux system however, with or without this EULA, it already gives you unlimited rights to use it.
Step 2: Create Username
Determine your own username and password here. Also, the password will be your sudo password.
Step 3: Select Geolocation
Select your geolocation. This selection will determine your date & time and numbering format.
Step 4: Partitioning
- 1) Select advanced mode
- 2) Create main partition
- 3) Create swap partition
- 4) Select bootloader location
- 5) Read summary carefully
First, select advanced mode on the three choices on top. This will bring us manual partitioner just like we saw on Ubuntu's.

Second, create main partition by Filesystem: EXT2, Mount point: /, and Size: 28GB (28000MB). We deliberately let the remaining space for the second partition (swap) below.

Third, create swap partition by Filesystem: SWAP and Size: 2GB (2000MB) or equal to the remaining space left by main partition above.

Fourth, the most important step in this tutorial, select bootloader location to be the USB drive location and not your internal HDD. For example, as you saw on the initial steps, here the SanDisk Cruzer Blade 32GB is located at /dev/sdb so the bootloader location should be /dev/sdb as well.

Fifth, read summary carefully here, examine that everything is CORRECT and does not touch your internal HDD at all. For example, according to this tutorial, there must be 2 partition to be formatted, /dev/sdb5 as EXT2 and /dev/sdb as SWAP if you install it on USB Flash Drive. For HDD or SSD, I recommend EXT4 instead of EXT2.

Step 5: Waiting
- Waiting
- Finishing
Wait for the actual process to take place. This should not take more time than 1 hour. On my practice, this needs more or less 40 minutes long.

Once finished, deepin will say "Successfully installed" on screen and let you reboot by clicking Experience Now button.

Final Result
Successful installation will give you a working deepin GNU/Linux system version 15.10 like below. Yes, you run it from a USB stick. Happy working!
This article is licensed under CC BY-SA 3.0.