KDE neon is a special GNU/Linux operating system released frequently that include the most recent KDE Plasma Desktop version. In other words, if you want to try the newest release of KDE Plasma, just try this KDE neon. This decision of KDE Project to publish neon is really helpful and easier for those KDE end-users, because we don't need to install any upgrade to our currently-installed GNU/Linux system. Of course, you can use KDE neon as livecd or as real-installed system or as virtual machine guest. This guide showing step by step to install KDE neon into your computer.
Subscribe to UbuntuBuzz Telegram Channel https://telegram.me/ubuntubuzz to get article updates directly.
Download neon OS
You can obtain KDE neon image at KDE neon website https://neon.kde.org/download. It is updated very fast so you may find the day you see it the more recent version it has. At this time (28 October 2016) KDE neon includes the KDE Plasma 5.8, the newest stable LTS version.
In the main download page https://neon.kde.org/download, you see two selections of KDE neon, User Edition and Developer Edition. Choose the User Edition.

In the actual download page http://files.kde.org/neon/images/neon-useredition/current/, choose the biggest size link with .iso in the end of its name.

For example, at this time, the correct ISO file name is neon-useredition-20161027-1018-amd64.iso with 1GB size and the actual download link is http://files.kde.org/neon/images/neon-useredition/current/neon-useredition-20161027-1018-amd64.iso.
Burn ISO to USB Drive
The fastest way to install GNU/Linux system is by using USB bootable. Just use program like Unetbootin to create it. Then boot your computer into that USB drive.
Step 1
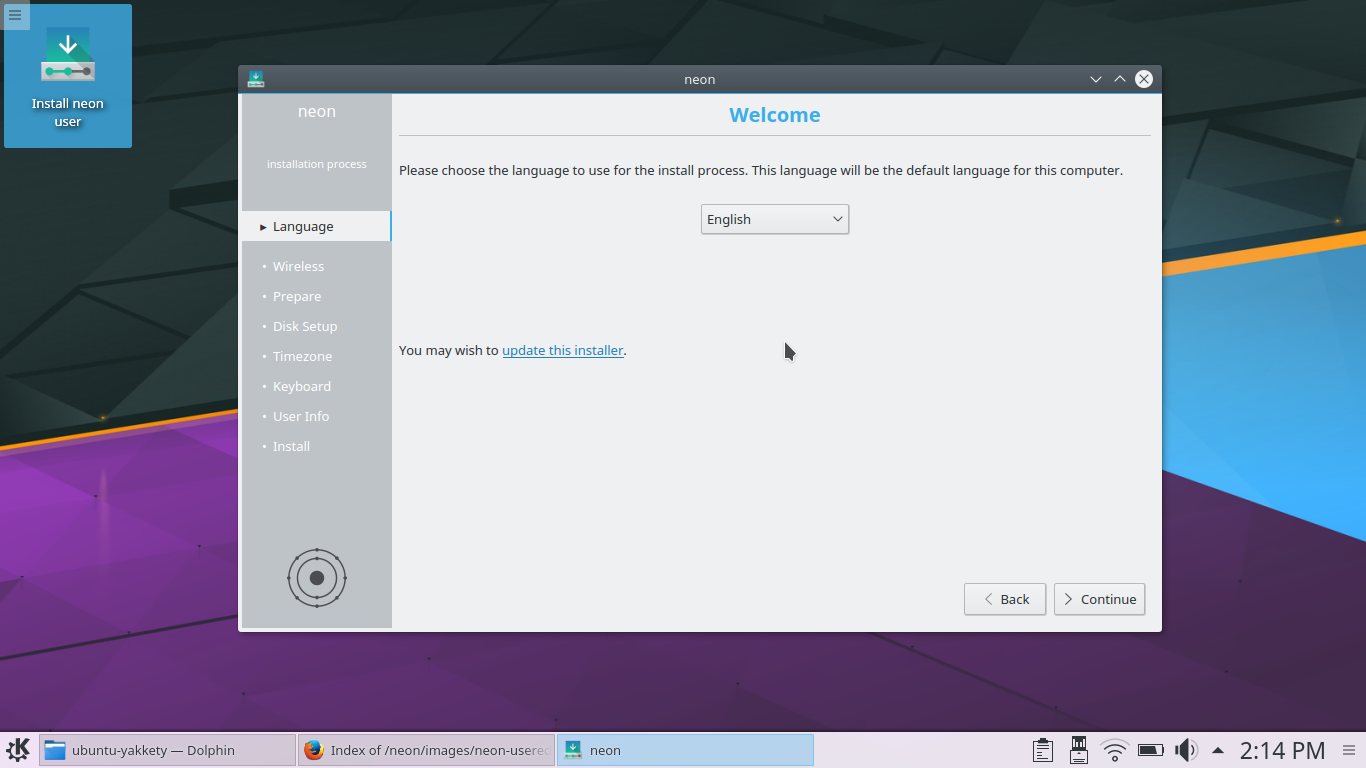
Entering neon desktop, of course it is KDE, click on Install neon user. This will open a window which is operating system installer. This installer is called Ubiquity. The first page of Ubiquity asks you about Language, choose it here, and press Continue. See the vertical panel on the left, it is the list of steps you will do in Ubiquity.
Step 2
The second page of Ubiquity asks you about Wireless and third page about Prepare. In both of them, for the sake of installation speed, don't enable any choice.

Step 3
Once you click Continue, if there is any partition from your disk drive is mounted, then Ubiquity asks you to unmount it. Just answer yes and continue.

Step 4
The fourth page of Ubiquity asks about Installation type, whether it is manual or automatic. Choose Manual and press Continue.

Step 5
Still in fourth page of Ubiquity, now you should create main partition (/) for neon. Click on the selection available, press Change, on the new window

Step 6
Still on the same page, now you can create a swap partition (if previously you did not have it). But if you are using a solid state disk (SSD) as disk drive, you better do not create a swap.

Step 7
Still on the same page, now you should choose where to place the bootloader. If your main partition is /dev/sda2 (child), then obviously the correct place for bootloader is /dev/sda (parent). Press Install Now to process into the actual system installation.

Step 8
After pressing Install Now, Ubiquity asks you for the last time to read the plans summary. Please read them and make sure there is no single mistake, otherwise you may destroy the whole data in your disk. For example, here I just planned to install neon into /dev/sda2 with my /dev/sda7 as swap so the information given is correct and I can press Continue to do partitioning (not the system installation).

Step 9
While partitioning is progressing, press Install Now button to proceed further.
Step 10
The fifth, sixth, and seventh pages of Ubiquity ask about your Timezone, Keyboard, and Username information, respectively. Just satisfy them all and proceed to the eighth page. When you are on the eighth page, just wait until it says Installation Finished.


Finish
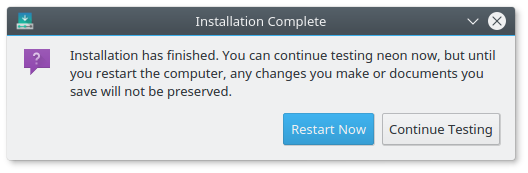
Your installation has finished when Ubiquity says Installation Complete like this. You may choose whether to restart or continuing live session. Happy KDE testing!